Showing posts with label decorum. Show all posts

Saturday, August 27, 2011

Educational Art


Antique Flash Card Wall Border


My mother-in-law passed away several years ago and after the family cleaned out all of the things that meant something to them the rest was left for trash.  This has been my favortie time to look at the things no one else deemed important.  I ran across these old, yellowed, flash cards.  My mother-in-law was a teacher in many forums besides the typical classroom.  She taught Sunday School, Cub Scouts, Grandkids, kids, and me.  She always had educational things around her house, like these, flash cards.  Her mother was also a teacher.  I wonder if they could have been hers.  This is a reminder of her love of education.

I have them in my back hall acting as a charming border at the top of the kitchen doorway.  Everytime I enter through that hall I see her smiling at me, I have a unique border, and I put my mind through the paces of mathematics.  Anyone who knows me knows I need all the help I can get. I am lucky to have had her in my life.  I miss her dearly and hope she knows how important every mundane detail of her stuff is to me.  I guess beauty is in the eye of the beholder after all. 

Friday, August 26, 2011

Croquet Balls Revisited


Playing with Photoshop.  I am really amazed.  Look at the difference of these two pictures!  The one on the left is the original.  There is alot of amber/yellow tones to it.  My house has these tones in the evening because of the giant shade tree sitting outside of it.  The picture on the left is what they should look like under natural light.  I know there are all kinds of things that can be achieved with photoshop but being "green" about it certainly ups the wonder factor. 

Still working on a photography course, will keep you posted! 

Oh, and before I forget, this centerpiece on my table was met with lots of fun dialogue, childhood memories, and goofing around when my family gathered.  Sure beats the ordinary candle and flower arrangement! 

Friday, August 12, 2011

Croquet Balls as Art


As I spent this last week in self-imposed chaotic
remodel/cleaning of my house getting ready for my parents to visit.  I didn't heed my advice
of taking it easier on myself.  I did think about it,
though!  I realized I didn't spend alot of time
thinking of new ideas!  I was too tired from cleaning!
Crazy irony I think! 

I recently purchased these very worn croquet balls
at a favorite flea market in a huge bucket, pictured above.  They now are piled on a ironstone platter, equally worn, with a key found in my mother-in-laws stuff.  They are the current
centerpiece on my dining room table! 

I am anxious to see what conversations arise when my
company arrives today.  Heard from a "design expert"
once to have fantastic unusual centerpieces to
stimulate conversation.  I have played with this idea and
set my table with Comic Book pages, race cars, army men
and other toys!  They have always been greeted with squeals
of delight from all "kids"!  What is more fun than a restaurant
that sets their tables with white paper and crayons? 

Enjoy your weekend with the ones you love most.  Create
something wonderful and let the conversations
begin!  

Monday, August 8, 2011

Limestoning and Learning


Sample wall in Back Hall


This is my first attempt at a decorative paint finish.  It is a snap shot I took of the work in progress.  First let me tell you about the process itself then about the snapshot.  Being a designer and junk store junkie, I marvel at the fact that I have never attempted this.  I love how it looks.  I love how it enhances all the old plaster on the walls.  It is soft and romantic, too.  The process is quite simple in its steps.  First I painted the base coat in a Vellum Color, flat, 2 coats.  The next color was the glaze.  4 Parts Eggshell Paint to 1 Part Glaze.  It is a custom grey color I had mixed up.  My color palette that has formed over the years is Creams, Silvers, China Whites, with punches of warm reds, vintage greens, chocolates and ebony.  You use a very dry, dry brush and create a mottled effect.  It is really fun to do this!  Then after 24 hours you dry brush your top coat on just like the glaze coating.  The only difference is you don't use the glaze so you have more coverage.  I chose my china white as the top coat.  After 4 hours of drying time you then wash the walls with a kitchen scouring pad.  This will wash down to the glaze, pull out plaster imperfections, and in some spots pull down to the base layer.  The colors I chose are soft and very natural.  You can use polyurethane in matte if it will get alot of wear, sanding between coats, as needed. 

Now the biggest "trick" of all!  The reason for the snap shot. I took this snapshot to send to a friend who is a master in decorative painting.  As I was studying (well admiring it if I am being totally honest) it on my computer I noticed that I don't have the grey edges feathered in well, it looks fake.  Since then I have taken an artist brush dipped in the top coat to lightly feather the edges in making it look more natural.  (Can't photograph the final look yet because camera and computer situation I blogged about earlier).  Sometimes your eye just doesn't catch those details until you take a photograph.  You will see professionals constantly doing this while they are staging a shoot.  Snapshots will show you details you might easily miss. I strongly suggest this when you are decorating an area or painting a decorative finish.  It can be very revealing!  It makes the difference between a professional and amateur job.

I can't' wait to show you the after photograph!  I have had lots of unsolicited comments about how pretty this "old" plaster wall is!  No one knows it is new!  I have started repainting all the walls in my back hall, yes the one I have given sneak peaks of already!  Yes I am repainting it after one week.  Yes my style has changed in one week, well I have refined it! That happens to us decorators, too!  It happens I just go with it!  I don't lament over the time I spent or money I spent (I usually am on the cheap anyway), I paint, grow, and I move on.  Think a life lesson just might be tucked in there, too! 

I should note that the prep makes all the difference.  Don't skimp ever on prep.  Make sure to tape off the areas, too! Very important when dry brushing! You are not "cutting in" like straight painting and it can get messy at the edges. Clean the walls and use TSP to knock any dirt, gloss off existing paint, grease and grime.  It makes all the difference!  I promise!  It is probably the least fun, most often overlooked, step that many people don't want to take the time to do (I understand that the desire for the finished product is intoxicating) but it is critical in achieving the best look possible.  Don't skimp or skip prep!  EVER, EVER, EVER! 


and this is the finished wall several days later, the edges are feathered in and there are decorations added to the wall. The Key Cabinet to hide all those nasty FOB's that we have. On Top a book on wire with ribbon.  The cuff keys are my father-in-laws when he was a police officer many years ago.  The aluminum stack cup was my mother-in-laws.  She carried it in her purse for many years.  The picture, on my cell phone.  Still no resolution to the computer issue!  Need to hide the screws, too.  Another thing that is easily overlooked until it shows up in a photograph!  Will post it again to show you the finished look and how all these snap shots made a difference!

Saturday, August 6, 2011

Expect the Unexpected


Expect the Unexpected

I have this tiny, tiny room off my kitchen.  I imagine this probably made my bungalow have an "eat-in" kitchen.  It is too tiny for even the small Formica Topped Tables I frequently see at Flea Markets. 
It is now the room where my Kitchen Aid lives because it is too tall for the back splash area in the actual kitchen.  Don't tell the Kitchen Aid
that!  It thinks it has a room all to himself!   

The window treatment is a little whimsy!  I threaded the leftover silver fabric from my headboard and a favorite stick found on a dog walk years ago that never seemed to make it to the compost heap.  Quite charming, off-beat, and fun.  That personal note that makes all the difference.  Note the really DARK chocolate color on the walls!  It defies the wives tale "dark colors make rooms smaller"  which is NOT true!  It makes this room much larger simply because you can't see where it starts and ends.  The ceiling is in Benjamin Moore's Cristal Blue Semi Gloss.  It just lifts!  (the wall color is Appalachian Brown from Benjamin Moore in Matte Finish).

I love this space.  It is so luxe in spite of it's 4X5 size.  It is a wonderful place to mix up a batch of something.  My Kitchen Aid is quite spoiled! 

Personal Touches with a touch of drama make for a happy space! Using dark colors that are "taboo" for tiny spaces and an unexpected stick put my personal stamp on this space and makes my family happy, too.  This is what makes a house a home, personal touches, unexpected ones, pieces that evoke memories or invoke conversations.  I don't see meaningful conversations started over a room that is overly decorated with no personal touches and that, my friends, is why those spaces are just pretty and not comfortable places that your family and friends like to be just because "it feels" good to be there.  That is what most people strive for, a comfortable place to be.  A place to make memories and to remember them, too. 

Wednesday, August 3, 2011

To Repaint or Not--That is the Question

Peaking out the front door
are one of my latest junk
store finds.

When I spied these sitting at the front door
of one of my favorite local flea markets
(for 10 bucks I might add).  I knew they were meant
to be.  Hauled them home with grand illusions of painting
them in Polished Mahagony with Fleur De Lis Stencils on
the back of them.  Then I plunked them on the front lawn
for my husband to see (there IS a story there!)
and love them just as they are. 
So my question is, or rather I am wondering out load,
How long will it take me to tire of the peeling paint
and start over? 
Hopefully never but my mind does change! 

Tuesday, August 2, 2011

ANOTHER SNEAK PEEK

Still working on the back hallway. 
Going to paint the apron shelf in
Ralph Lauren Tennis Court White.
One small problem.  The Home Depot I
went to stopped carrying Ralph Lauren. 
Hoping that it is a location issue! 
Thought I'd do a dry run. 
The aprons look great here but come
fall it will hold my husbands
jackets. 


My favorite apron.
The black and white looks so
modern and retro at the same time.
Don't look too closely
It is dirty from wiping my hands on it! 
Would rather put it back on and bake something
wonderful than loose it to the wash
even for just one minute! 

Monday, July 25, 2011

Sneak Peek


The door to nowhere.  I think every old house has a couple of these.  My 1925 Bungalow is no exception!  Actually this is a second door to my son's room from the back hall.   Seems a litle silly to us.  Easy way to escape when you are a teenager!  We disabled the door and had plans to close it off permantely but soon discovered it housed our desk just perfectly.  The recess the door creates is just enough to allow the desk to sit next to the panty.  It really was unsightly.  The wall paint was not enhancing the back hall either.  It had to go! 

This is the view from the kitchen now.  Tennis Court White Paint by Ralph Lauren in a Semi-Gloss finish are washed all over the walls.  Gasp all you Flat Paint lovers!  The semi-gloss finish accomplishes two things, it reflects light in this windowless space and is easy to clean!  The Ceilings are Crystal Blue by Benjamin Moore also in Semi Gloss.  For the finishing touches, white drapes with white tassles hanging over a black and white picture that fits behind the antique green writing desk.  It is now this cozy office space while the space is actually enlarged.  The rest of the space isn't completed yet.  The floor at the landing needs attention.  I just couldn't resist sharing.  It is currently my favorite spot in the house!

Sunday, July 24, 2011

All in a Day's Play


Spent my Sunday in my favorite Discount Store and Junk Store.  Yielded this Fluer De Lis, tassles, and some odds and ends.  Earmarked for my latest project. 


I am redoing my back entry to the house.  Will share pictures later!  Spent the weekend prepping, painting, and more painting.  Then decided that I needed some stuff to go in it!  Have alot of ideas swimming in my head right now.  Suffered 2 days of migraines but managed to get the painting of the ceiling and walls completed.  Next the landing. . .
Will share, I promise! 


Saturday, July 23, 2011

Gussied Up and Ready for the Ball

The Range, in place, ready to go!


Lots of decorative touches on the shelf.  I do use almost all of them but couldn't resist some babbles.  This range is really neat and definately superior in quality to ordinary stoves.  We are lucky to have this!  I have made black current jam, baked a cherry crisp, and Swiss Chard Strata all with local ingredients as well as making our favorite Mole Pulled Pork Tacos and BLT's, Corn on the Cob, and the list is growing.  Spoiled Girl.  Happy Girl. 

Thursday, June 9, 2011

New Color, New Look

The Living Room Takes on another look.  Hammered Silver by Sherwin Williams.  Historically accurate colors that enhance the white oak trim.  Gold drapes add a lush touch.  The dog, well he just can't resit the camera.  I am thinking Benjamin Moore's Sand Beige--a super soft pink--to give the ceiling a candle lit glow. 
(Previous posts show the room in buttery yellow) 

Wednesday, June 1, 2011

ATTIC DREAMING
I have always wanted an attic that seemed as if family treasures were held there for generations.  This memorial day, I made my attic into that place.  I eliminated all boxes, hung old pictures, and arranged all the odds and ends.  Now I love venturing up into my space for the perfect serving dish or holiday decoration and my son has spent several hours playing with old family toys.  Even the kitten couldn't resist the new space.  It just reaffirms my mantra:  Every Space should be beautiful and useful!  Even when it is storing the stuff of life! 


Wednesday, February 9, 2011

Tile as Art

This really innovative and fun tile takes the edge off.  It reminds me of a beautiful Calico Cat and looks beautiful with white cabinets.  The tile acts as the art in this delightful application. 

Friday, October 22, 2010

share this

                                                       share this

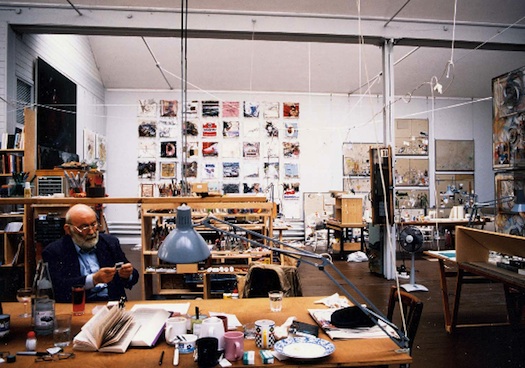
I am addicted to "The Improvised Life" and love when they show creative spaces in use as opposed to staged for the camera.  It certainly makes me feel better about the messes I can create in my own home during my creative spells!  Forgive me for not showing the article or picture credit correctly.  I am still stumbling and haven't figured it out yet.  Please go to the link above to read the entire article or visit their blog. 

Wednesday, October 20, 2010

Black, White and Plum

 Recently, my love for black and white has been rekindled after a long stray to the very colorful.  My kitchen is undergoing a black and white transformation. Tennis Court White with splashes of black to be exact.  Here is my latest China Find.  Black and White.  Perfect backdrop for seasonal plums drizzeled with local honey. 

Tuesday, October 12, 2010


The last of the summer harvest.  This summer was not a great summer for tomatoes because of all the rain we endured in the midwest.  A couple of Sunday's ago, I finally faced my garden and was suprised by the abundance of pole beans.  They went up their bamboo poles, over the fence and around the scarecrow. 

Saturday, October 9, 2010

Re-Purposing the "Good Stuff"


These crystal candy dishes made 
their way to my house in the form
of wedding presents and inheritance
items from dear family members.

I don't keep candy around the house
and detest not using the things I own.
I have re-purposed these to hold the
spare grinds from my favorite coffee
and keeping those odd amounts of peas and beans in my cabinet.  

I am a firm believer that you should use everything you own, even the "good stuff" everyday even if it isn't for its original intent!  This allows my creativity to soar and re-purposing things is alot of fun!  Much better than storing wonderful items in boxes in the attic! 

Notice the exposed plaster and lathe--another post for another day!


Sunday, October 3, 2010

The Green Men--A Child's Touch

I deposited a green work bench and window frame, both earmarked for the bathroom remodel, along the living room wall one particularly successful Saturday afternoon, along with a doorknob.  My son immediately placed his little green men on the bench for a battle.  The effect is nothing short of charming.  There they stayed until they won the battle and were marched on. 


Thursday, September 30, 2010

Remembering Marriette

I like "junk".  Chipped Paint, hand-made, and almost forgotten.  Kitchen Utensils, linens, dishes, oddities, and books.  They connect me, inspire me, and help me look to the future.  They soothe me.  They echo the past while connecting me to the present and future. 

This collection of red and yellow painted kitchen utensils started with my grandmother, Marriette.  When I hold them I can connect with her.  It has started an ongoing hunt for more.  In order to let my son know which came from his family and which ones just showed up, I have been cataloging them with a picture of her.